


Setting a Static IP for Epson Printer
Problem: Printer IP Address Changing
When the printer is set to Automatic IP mode, its IP address can change if the connection to the router is lost. When the connection is re-established, the IP may be reassigned automatically, causing the printer to disconnect from the POS terminal. To reconnect, you’d need to enter the new IP manually into the POS settings, leading to delays or interruptions in operation.
To avoid this issue, it’s best to assign a Static IP to the printer
This ensures the IP remains constant under all circumstances and the connection continues uninterrupted.
Below is a list of commonly used printers, each linking to detailed instructions on how to assign a static IP:
(List of printers & links)
To assign the IP, please follow these steps
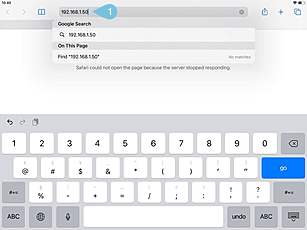
- Enter the printer’s current IP in your browser—preferably using the iPad with the POS app.
Example: 192.168.1.50
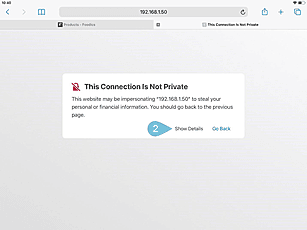
- Click Show Details.
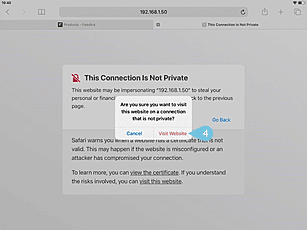
- Click Visit this website.

- Click Visit Website.
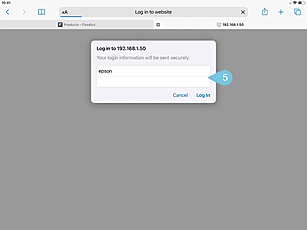
- Enter the username and password as follows:
- Username:
- Password:
Note: If the default credentials don’t work, try using the printer’s serial number as the password. You can find it printed on the back of the printer.
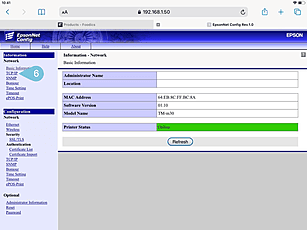
- From the side menu, select Configuration, then click TCP/IP to display network settings.
- Under Acquiring the IP address, choose Manual, then click Send to apply.

- Click Reset to restart the printer.

- How to find the IP address of the Epson TM‑m30 printer